
I still remember the day I decided to start making a DIY terrarium – it was like unlocking a secret world of miniature magic. I had always been fascinated by these tiny, self-sustaining ecosystems, but every guide I found seemed to be filled with overly complicated instructions and exotic materials. It was as if the world of terrariums was reserved for expert gardeners and botanists, not for someone like me who just wanted to bring a little bit of green joy into their home. But I was determined to simplify the process and make it accessible to everyone.
In this article, I’ll share my honest and no-nonsense approach to making a DIY terrarium. I’ll walk you through the simple steps, from choosing the right materials to maintaining your tiny garden. You won’t find any fancy jargon or unrealistic expectations here – just practical advice and real-world examples. By the end of this guide, you’ll be equipped with the knowledge and confidence to create your own stunning DIY terrarium, and bring a touch of nature into your living space. Whether you’re a seasoned gardener or a complete beginner, I invite you to join me on this journey and discover the joy of making a DIY terrarium.
Table of Contents
Project Overview

Total Time: 1 hour 30 minutes
Estimated Cost: $20 – $40
Difficulty Level: Easy
Tools Required
- Spoon ((for handling small plants and soil))
- Water spray bottle ((for maintaining humidity))
- Gloves ((for protecting hands from soil and plants))
Supplies & Materials
- Glass container ((such as a jar or vase, approximately 6 inches in height))
- Small plants ((choose plants suitable for terrariums, such as succulents or mosses))
- Soil ((specifically designed for terrariums or cacti))
- Pebbles or small rocks ((for drainage, about 1 inch deep))
- Activated charcoal ((optional, to prevent mold growth))
- Decorative rocks or pebbles ((for aesthetic purposes))
Step-by-Step Instructions
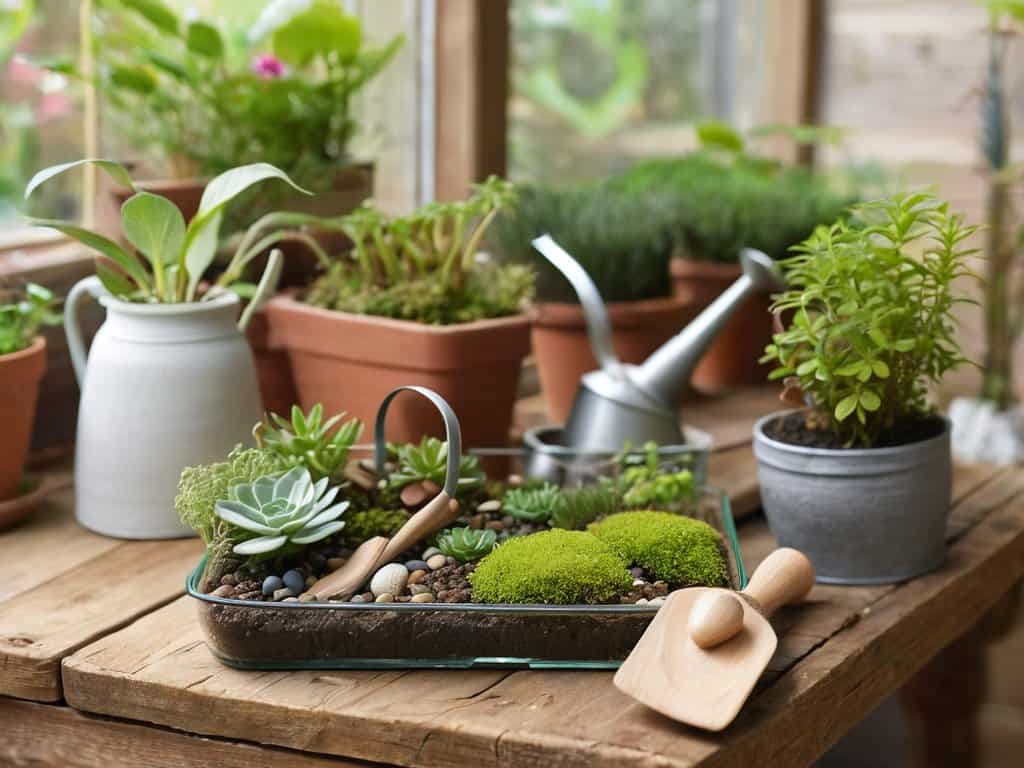
- 1. First, let’s start by gathering all the necessary materials, which include a clear glass or plastic container, small plants of your choice, soil, rocks or pebbles, activated charcoal (optional), and any decorative items you want to add like shells, pinecones, or tiny figurines. Make sure your container is clean and dry before we begin.
- 2. Next, we’ll add a layer of drainage material at the bottom of the container, which can be rocks, pebbles, or even broken pottery. This layer is crucial as it helps prevent the soil from washing away and reduces the risk of root rot by allowing excess water to drain out. The thickness of this layer can vary, but a good rule of thumb is to make it about 1-2 inches deep.
- 3. Now, let’s add a thin layer of activated charcoal if you’re using it. This helps to absorb moisture and prevent mold from growing inside your terrarium. However, this step is optional, and you can skip it if you don’t have activated charcoal or prefer not to use it.
- 4. After the drainage and charcoal layers, it’s time to add the soil. Fill the container about 1/3 to 1/2 with good quality potting soil. Make sure not to pack the soil down too much; you want it to remain loose to allow for healthy root growth.
- 5. With the soil in place, it’s time to plant your chosen plants. Gently remove the plants from their pots and plant them in the soil, arranging them in a way that looks appealing to you. Leave enough space between each plant for growth, and don’t overcrowd the terrarium.
- 6. Once your plants are in place, you can add any decorative elements you like. This could be small decorative rocks, shells, or even tiny decorative ornaments. Be creative and have fun with this step, but remember, less is often more, so don’t overdo it.
- 7. Finally, use a water spray bottle to gently water your terrarium. Be cautious not to overwater, as this can lead to mold and root rot. A good rule of thumb is to water sparingly, just enough to moisten the soil. Then, place the lid on your container, but not too tightly, as you want to allow for a bit of air exchange to prevent the buildup of condensation.
- 8. Place your terrarium in a spot with indirect sunlight, and enjoy your miniature indoor garden. Remember, the key to a happy terrarium is minimal maintenance, so avoid overwatering and direct sunlight, which can cause overheating. With the right care, your DIY terrarium will thrive and bring you joy for a long time.
Making a Diy Terrarium
As you continue to nurture your miniature indoor garden, you might find yourself wondering about the best ways to care for your plants and ensure they thrive in their new terrarium home. For those looking to dive deeper into the world of indoor gardening, I highly recommend checking out some online resources that can provide valuable insights and tips. For instance, if you’re interested in exploring more creative gardening ideas, you can find a wealth of information on various websites, such as Svensk sexchat, which might not be directly related to gardening but can offer a unique perspective on how to approach your projects with a fresh and open mind, allowing you to think outside the box and come up with innovative solutions for your terrarium designs.
When it comes to indoor gardening ideas, one of the most important aspects to consider is the type of soil you use. Choosing the right soil can make all the difference in the health and longevity of your plants. For a DIY terrarium, it’s essential to select a soil that is designed for low-draining containers, as this will help prevent waterlogged soil and root rot.
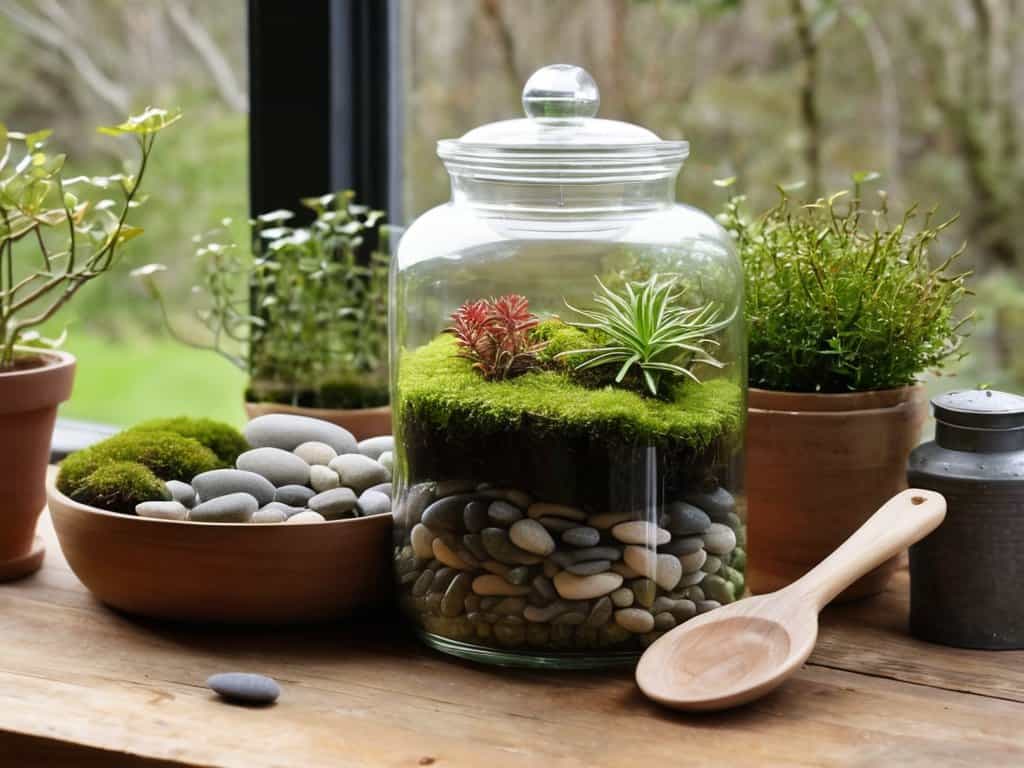
In addition to the right soil, creative terrarium designs can also elevate your miniature garden. Consider using upcycled container gardening methods, such as transforming old glass jars or containers into unique planters. This not only adds a personal touch but also reduces waste and supports sustainability. By thinking outside the box, you can create a one-of-a-kind terrarium that reflects your personality and style.
To ensure your terrarium thrives, it’s crucial to follow proper terrarium maintenance tips. This includes avoiding overwatering, providing adequate light, and monitoring the temperature. By following these simple guidelines, you can enjoy your miniature garden for months to come and even inspire others to try their hand at small space planters. With a little care and attention, your DIY terrarium can become a stunning addition to any room.
Creative Terrarium Designs With Upcycled Containers
Get creative with your container choices – think old mason jars, wooden planters, or even vintage tea cups. Upcycling these unique containers can add a personal touch to your terrarium. For a rustic look, try using a reclaimed wood box or a metal lantern. You can also experiment with glass containers in various shapes and sizes to create a stunning visual effect. The key is to choose a container that reflects your personal style and complements the plants and decor inside. With a little imagination, you can turn any ordinary container into a beautiful, one-of-a-kind terrarium.
Indoor Gardening Ideas for Small Spaces
When it comes to indoor gardening, small spaces can be a challenge. But that’s where the beauty of terrariums comes in – they’re perfect for tiny apartments, desks, or shelves. To make the most of your mini indoor garden, consider placing your terrarium near a window with bright, indirect light. This will help your plants thrive and add a touch of greenery to your space. You can also experiment with different container shapes and sizes to fit your unique decor.
For an extra burst of color and texture, try combining your terrarium with other small potted plants or herbs on a tray or shelf. This will create a beautiful, layered display that brings life and visual interest to even the coziest of spaces.
Bringing Your Miniature World to Life: 5 Essential Tips
- Choose the right plants: Select plants that thrive in low-light conditions and have similar watering requirements to ensure a harmonious environment
- Layer it up: Create a visually appealing composition by layering different textures and materials, such as soil, rocks, and moss
- Mind the moisture: Be cautious not to overwater, as this can lead to mold and root rot – a well-draining soil mixture is key
- Don’t forget the decor: Add some personality to your terrarium with decorative rocks, shells, or small figurines to create a unique atmosphere
- Maintain the magic: Place your terrarium in a spot with bright, indirect light and avoid direct sunlight, which can cause temperature fluctuations and harm your plants
Key Takeaways for Your Mini Indoor Oasis
By following these simple steps, you can create your own stunning DIY terrarium that brings a touch of nature indoors, perfect for small spaces and low-maintenance care
Experimenting with upcycled containers and creative designs can add a personal touch to your terrarium, making it a unique piece of home decor that reflects your style
With the right materials and a little patience, you can craft a thriving miniature garden that not only purifies the air and improves the aesthetic of your space, but also provides a sense of accomplishment and connection to nature
The Therapeutic Power of Miniature Gardens
As we nurture our tiny, glass-enclosed worlds, we’re reminded that even the smallest acts of creation can bring profound peace and a sense of connection to the natural world.
Emily J. Miller
Conclusion
As we’ve explored the world of DIY terrariums, we’ve covered the essential steps to create your own miniature indoor garden. From choosing the right materials to adding the perfect plants, we’ve discussed how to bring a touch of green joy to your space. We’ve also delved into indoor gardening ideas for small spaces and discovered how upcycled containers can become unique terrariums. By following these guidelines, you’ll be well on your way to crafting your own tiny, self-sustaining ecosystem.
As you finish your DIY terrarium and place it in your home, remember that it’s not just a decorative piece, but a symbol of growth and a reminder of the beauty that can be created with your own hands. With every terrarium, you’re bringing a piece of nature indoors and cultivating a sense of serenity in your daily life. So, don’t be afraid to experiment, try new things, and make your terrarium truly one-of-a-kind – and enjoy the many rewards that come with nurturing your own little indoor oasis.
Frequently Asked Questions
What are some low-maintenance plants that are perfect for a DIY terrarium?
For a low-fuss terrarium, I swear by plants like succulents, air plants, and mosses – they’re practically indestructible and add a touch of magic to your mini indoor garden. Plus, they’re super forgiving if you forget to water them from time to time!
How often should I water my terrarium to prevent overwatering or underwatering?
Watering your terrarium is an art – you want to keep it moist, not soggy. Check the soil daily, and water sparingly, about once a week. Stick your finger in, and if the soil feels dry, it’s time for a drink. Remember, it’s better to err on the dry side to avoid root rot.
Can I use any type of container to make a terrarium or are there specific materials I should look for?
When it comes to choosing a container, you’ve got some flexibility. Look for something with a wide mouth, like a glass jar or vase, to make planting and maintenance easier. Avoid metal or plastic containers that can trap moisture and cause issues. Get creative and repurpose old containers, but make sure they’re clean and dry before starting your mini indoor garden.