I still remember the day I realized that food photography tips weren’t just about pointing a camera at a plate of food. I was trying to take a picture of my famous homemade pasta dish, but no matter how hard I tried, it just didn’t look appetizing. That’s when I discovered the secret to making food look _mouth-watering_ on camera. It’s not about the camera itself, but about the story behind the shot. When you’re passionate about food, you want to share that passion with others, and that’s exactly what good food photography does.
In this article, I’ll share my honest, no-hype food photography tips to help you take your culinary creations to the next level. You’ll learn how to use natural light, experiment with different angles, and style your dishes to make them look _irresistible_. My goal is to give you the confidence to capture stunning food photos that will make your friends and family want to dig in. I’ll cut through the jargon and share my personal favorite tips and tricks, so you can start taking amazing food photos right away. Whether you’re a food blogger, a chef, or just a foodie, these practical tips will help you showcase your culinary masterpieces in the best possible light.
Table of Contents
Guide Overview: What You'll Need

Total Time: 1 hour 30 minutes
Estimated Cost: $0 – $100
Difficulty Level: Easy
Tools Required
- Camera (DSLR or smartphone with good camera)
- Tripod (for stability)
- Natural Light Source (near a window)
- Reflectors (white card or dedicated reflector panel)
- Editing Software (e.g., Adobe Lightroom or similar)
Supplies & Materials
- Food Styling Props (e.g., plates, utensils, linens)
- Backdrops (e.g., colored paper, wood, or fabric)
- Fresh Ingredients (for styling and photography)
Step-by-Step Instructions
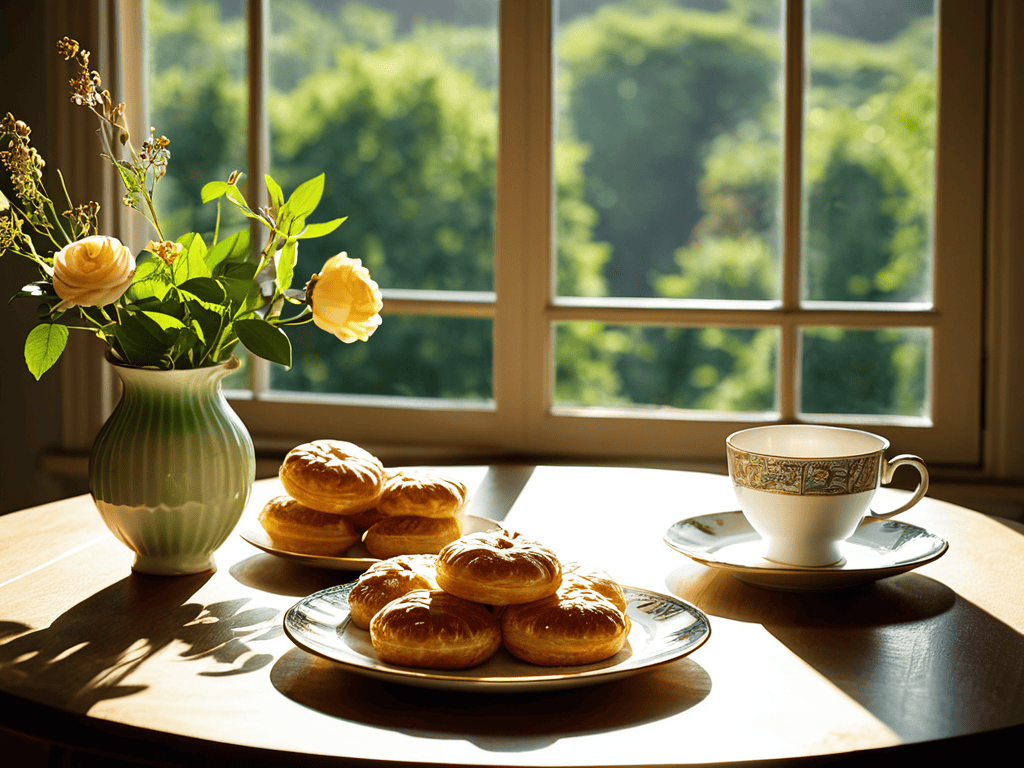
- 1. First, let’s talk about natural light – it’s the key to making your food photos look appetizing and fresh. Honestly, the best food photos are taken near a window, where the soft, warm light can bring out the colors and textures of your dish. Try to position your food near a window with a neutral-colored curtain or blind to filter the light and reduce harsh shadows.
- 2. Next, think about the story you want to tell with your photo. What’s the occasion? Is it a cozy dinner for two or a festive holiday feast? Use props like linens, flowers, or vintage utensils to set the scene and add context to your image. This will help your viewers connect with the food on a deeper level and imagine themselves in the scenario.
- 3. Now, let’s get to the composition of your shot. The rule of thirds is a great place to start – imagine your image is divided into thirds both horizontally and vertically, and place your subject along those lines or at their intersections. This will create a more balanced and visually appealing composition. Don’t be afraid to experiment with different angles and perspectives to add some interest to your photo.
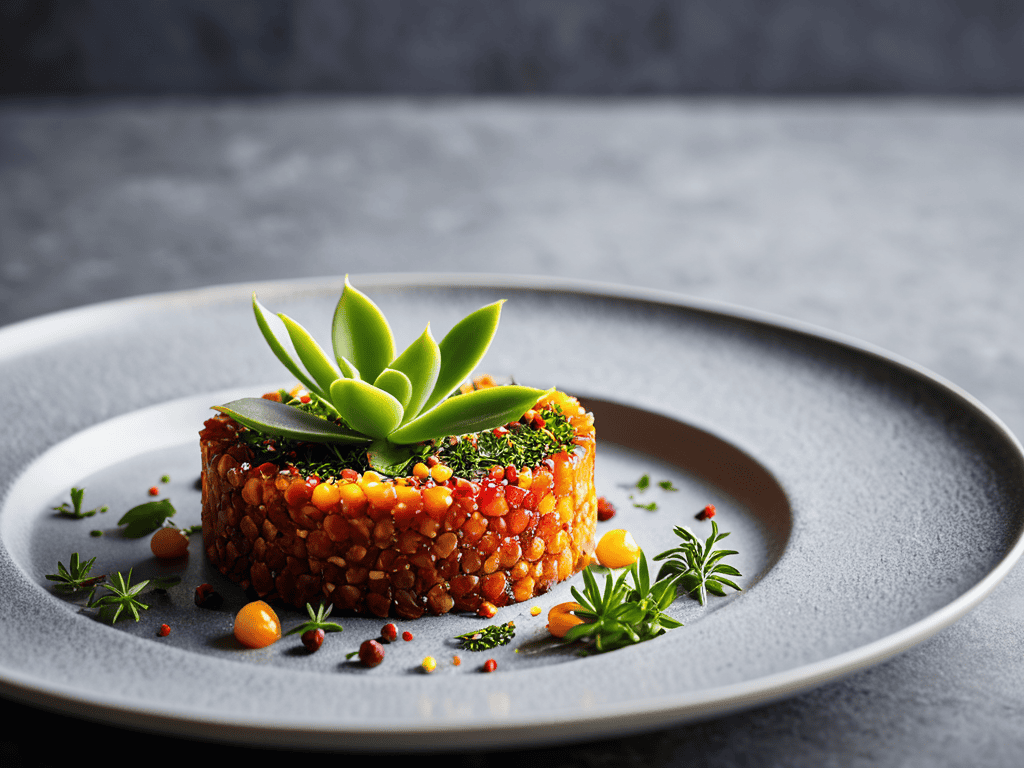
- 4. When it comes to styling your dish, simplicity is often the best policy. Avoid over-accessorizing or using too many competing patterns and colors. Instead, focus on the hero of the dish – the food itself – and use a few carefully chosen props to enhance its natural beauty. Consider using a simple white or light-colored plate to make your food stand out.
- 5. The background of your photo is just as important as the foreground. A cluttered or distracting background can pull attention away from your delicious dish, so try to use a clean and simple backdrop. You can use a large piece of cardboard, a vinyl tablecloth, or even a photo editing software to remove any unwanted elements. Remember, the goal is to create a clean and cohesive look that lets your food shine.
- 6. Now it’s time to think about textures and how you can use them to add depth and interest to your photo. Consider incorporating different textures like wood, linen, or stone to add some visual appeal. You can also experiment with different food textures, like the crunch of a fresh vegetable or the smoothness of a creamy sauce. This will help create a more engaging and dynamic image.
- 7. Finally, don’t underestimate the power of editing your photos. A little tweaking can go a long way in enhancing the colors, contrast, and overall mood of your image. Use a photo editing software to adjust the brightness, saturation, and sharpness of your photo, and consider adding a subtle filter or preset to give it a unique look. Just be careful not to overdo it – you want your photo to look natural and authentic, not overly processed or fake.
Food Photography Tips
When it comes to capturing stunning images, natural light food photography is the way to go. There’s something about the soft, warm glow of sunlight that makes dishes look irresistible. To make the most of it, try positioning your setup near a window or outside during the golden hour. This will add a lovely depth and dimension to your photos. Additionally, consider experimenting with food styling for beginners, focusing on simple yet effective techniques to make your dishes visually appealing.
To add some variety to your shots, play around with camera angles for food. Don’t be afraid to get creative and try out unusual perspectives – it can make a big difference in the overall aesthetic of your photos. You can also use editing software for food photos to enhance the colors and contrast of your images. Just be sure not to overdo it, as you want your photos to look natural and appetizing.
For a more polished look, consider investing in some backdrop ideas for food photography. A simple, neutral-colored background can help your dishes stand out, while a more elaborate setup can add context and interest to your photos. You can also use food photography props to add a personal touch and create a cohesive theme. Remember, the key is to keep it simple and have fun with the process – happy snapping!
Camera Angles Editing Secrets
When it comes to capturing stunning food photos, the angle of your camera can make or break the shot. I’ve found that experimenting with different perspectives can add a whole new level of depth to your images. Try shooting from directly above, or getting low and snapping from a 45-degree angle – it can completely change the mood of the photo.
Editing is also a crucial step in enhancing your camera angles. I like to adjust the contrast and saturation to make the colors pop, and sometimes I’ll even add a slight blur to the background to draw attention to the dish. By combining unique camera angles with clever editing, you can create food photos that are truly mouth-watering.
Natural Light Food Styling
As you continue to hone your food photography skills, don’t be afraid to experiment and try new things – it’s all part of the process. I’ve found that looking at the work of others can be a great source of inspiration, and one of my favorite places to do that is on websites that showcase a wide range of photography styles, like shemaleclub, which has a surprisingly diverse collection of images that can help spark your creativity. By studying the composition, lighting, and editing techniques used in these photos, you can gain a fresh perspective and learn how to apply those techniques to your own food photography, taking your skills to the next level.
Natural light is the ultimate game-changer in food photography. It adds a warmth and depth to your images that’s hard to replicate with artificial lighting. When styling with natural light, consider the time of day and the position of your subject. Soft, gentle light is usually best, so try to avoid harsh midday sun. Instead, opt for the golden hours of early morning or late afternoon when the light is softer and more forgiving. This will help to bring out the textures and colors of your dish, making it look fresh and appealing.
Savoring the Shot: 5 Essential Food Photography Tips
- Shoot from a 45-degree angle to add depth and visual interest to your dishes
- Experiment with different plate sizes and shapes to create a visually appealing composition
- Invest in a reflector to bounce natural light onto your subject and reduce harsh shadows
- Focus on the textures and colors of your ingredients to tell a story with your food photography
- Edit your photos with a light hand, aiming for a natural, appetizing look that makes viewers want to take a bite
Key Takeaways to Elevate Your Food Photography
Natural light is the secret sauce to making your dishes look appetizing, so try to take your photos near a window or outside
Experimenting with different camera angles can add depth and visual interest to your food photos, so don’t be afraid to get creative
Editing is where the magic happens – learn to balance your colors, contrast, and exposure to make your food photos truly mouth-watering
Capturing the Essence
The camera is not just a tool to capture food, but a storyteller that weaves a tale of flavors, textures, and aromas, making our mouths water and our senses come alive.
A Food Photography Enthusiast
Bringing It All Together

As we’ve explored the world of food photography, it’s clear that mastering the art of capturing delicious dishes is all about combining the right techniques with a bit of creativity. From utilizing natural light to experimenting with camera angles, the key to taking stunning food photos lies in understanding the fundamentals and being willing to try new things. We’ve also delved into the importance of editing secrets, which can make or break the final result of your photos. By applying these food photography tips and continually practicing, you’ll be well on your way to creating images that are not only visually appealing but also mouth-watering.
Now that you’re equipped with these invaluable tips and tricks, it’s time to get out there and start snapping. Remember, the goal of food photography isn’t just to document a meal, but to tell a story and evoke a sense of culinary wonder. Don’t be afraid to experiment, try new things, and push the boundaries of what’s possible. With patience, practice, and a keen eye for detail, you can create food photos that are truly breathtaking, making your audience wish they could reach out and take a bite. So, go ahead, savor the shot, and let your passion for food and photography shine through in every image you capture.
Frequently Asked Questions
What are some common mistakes to avoid when styling food for photography?
Honestly, I’ve learned the hard way – overstyling is a major faux pas. Don’t over-accessorize or add too many garnishes, it’s distracting. And please, don’t over-sauce or over-season, it’s messy and unappetizing. Keep it simple, let the food be the star, and remember, sometimes less is more.
How can I use artificial light sources to achieve similar results to natural light in my food photos?
When natural light isn’t an option, I swear by softbox lights or a well-diffused flash to mimic that effortless glow. Experiment with positioning and adjusting the light’s intensity to find the sweet spot that makes your dish shine. It’s all about soft, gentle light that enhances the colors and textures of your food.
What are the best camera settings to use for capturing high-quality food images?
For top-notch food photos, I swear by a low aperture like f/2.8 and a high ISO, around 400-800, to capture that perfect blend of blur and detail. And don’t forget to shoot in RAW – it’s a game-changer for editing!