I still remember the day I decided to replace my old light fixture – it was a daunting task, but I was determined to do it safely. The problem is, most of us have been led to believe that how to replace a dated light fixture safely is a complicated process that requires hiring a professional. But the truth is, with the right guidance, it’s a task that can be accomplished by anyone. I learned that it’s essential to turn off the power to the circuit at the electrical panel before starting the replacement process, and this simple step can make all the difference in ensuring your safety.
In this article, I’ll share my personal experience and provide you with practical advice on how to replace a dated light fixture safely. You’ll learn the step-by-step process of replacing your old light fixture, from preparing the necessary tools to installing the new one. My goal is to empower you with the knowledge and confidence to tackle this task on your own, without breaking the bank or putting yourself at risk. By the end of this guide, you’ll be able to replace your old light fixture with ease and enjoy the benefits of a safer and more energy-efficient lighting system.
Table of Contents
Guide Overview: What You'll Need
Total Time: 1 hour 30 minutes
Estimated Cost: $50 – $100
Difficulty Level: Intermediate
Tools Required
- Voltage Tester to ensure safety
- Needle-Nose Pliers for wire manipulation
- Screwdriver both flathead and Phillips
- Ladder sturdy, 6 feet tall
- Wire Strippers for 12-gauge wire
Supplies & Materials
- New Light Fixture chosen to fit the space
- 15-amp Wire Nuts or as specified by the new fixture
- Mounting Hardware as included with the new fixture
- Fuses or Circuit Breakers as applicable to the electrical panel
Step-by-Step Instructions
- 1. First, let’s get started by turning off the power to the circuit at the electrical panel, and verify it’s completely dead using a non-contact voltage tester to ensure our safety while working with electrical components.
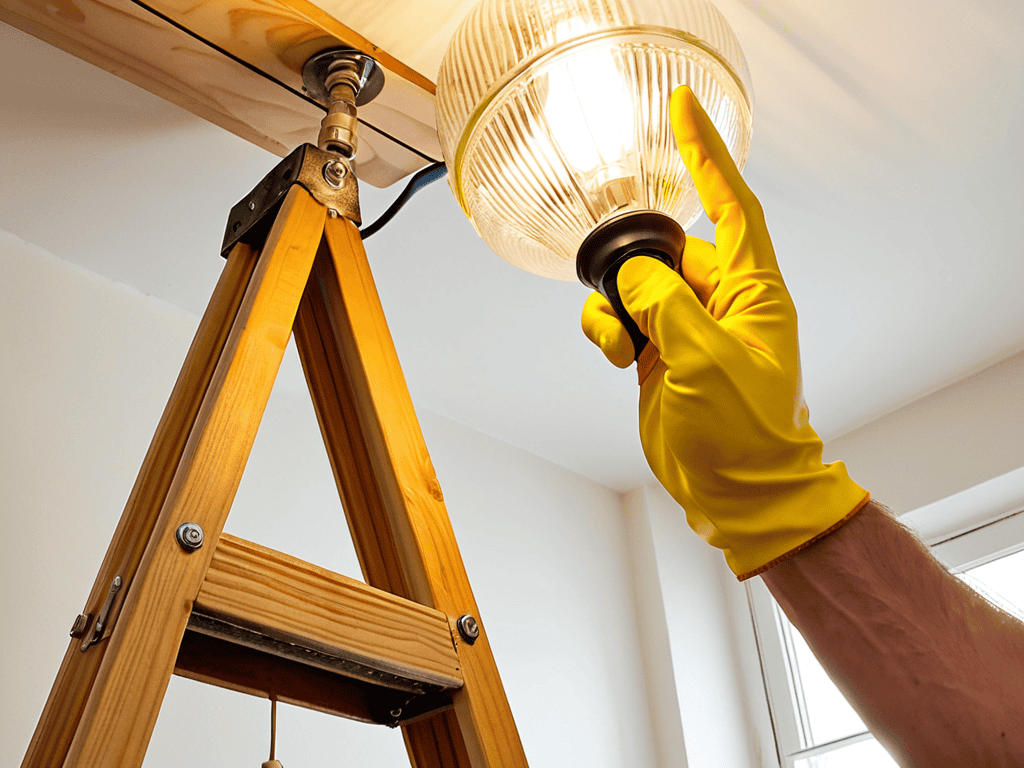
- 2. Next, remove any glass covers or shades from the old light fixture to prevent them from getting damaged or broken during the removal process, and set them aside in a safe place where they won’t get lost or accidentally thrown away.
- 3. Now, take a closer look at the old light fixture and identify the type of mounting it has, whether it’s screw-in, clip-in, or another type, as this will determine the tools and approach you’ll need to remove it safely and efficiently.
- 4. Using the appropriate tools, such as a screwdriver or wrench, carefully loosen and remove the screws or clips holding the old light fixture in place, taking care not to strip any screws or damage the surrounding surface.
- 5. Once the old light fixture is removed, take a moment to inspect the electrical connections and clean out any dust or debris that may have accumulated, making sure the area is free from any obstructions or hazards.
- 6. Next, take your new light fixture and carefully remove it from its packaging, taking note of any specific installation instructions provided by the manufacturer, and prepare it for mounting by attaching any necessary hardware or accessories.
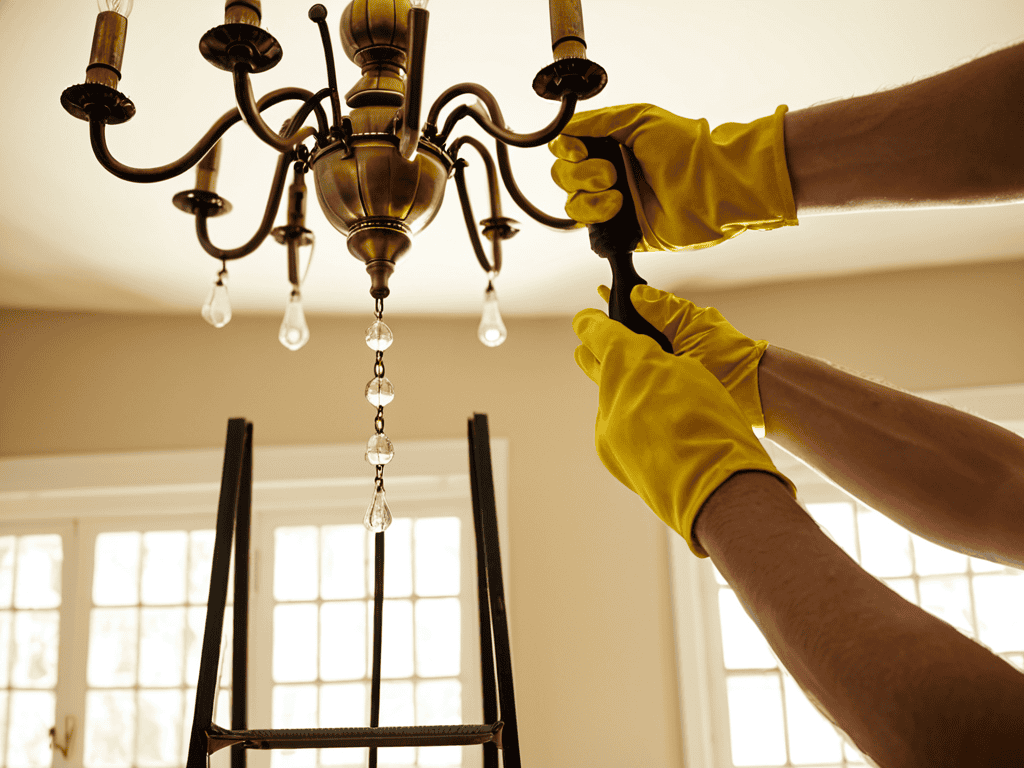
- 7. With the new light fixture ready, carefully mount it to the ceiling or wall using the appropriate screws or clips, making sure it’s securely fastened and levelled properly to ensure even lighting and a professional finish.
- 8. Finally, turn the power back on at the electrical panel and test the new light fixture to make sure it’s working correctly, and double-check for any loose connections or issues that may need to be addressed before considering the job complete.
Swap Safely Dated Light Fixtures

When it comes to swapping out old light fixtures, safety precautions for electrical work are paramount. Before you start, make sure you’ve turned off the power to the circuit at the electrical panel. It’s also a good idea to invest in a voltage tester to ensure there’s no electricity flowing to the fixture. This simple step can save you from a world of trouble, including electrical shocks and even fires.
As you’re choosing the right light fixture for your space, consider energy efficient lighting options. Not only can they help reduce your carbon footprint, but they can also save you money on your energy bills in the long run. Look for fixtures with LED bulbs or those that are specifically designed with energy efficiency in mind. Additionally, take some time to understand wiring diagrams for your new fixture, as this will make the installation process much smoother.
One of the most common mistakes people make when installing new light fixtures is not hiring a licensed electrician when they need one. If you’re not comfortable with electrical work or if you’re unsure about any part of the process, it’s always best to err on the side of caution and bring in a professional. They can help you avoid common lighting fixture installation mistakes and ensure that your new fixture is installed safely and correctly.
Choosing the Perfect Replacement Fixture
As you’re working on replacing that outdated light fixture, it’s essential to have a reliable source for all your home improvement needs. If you’re in the Stuttgart area, you might want to check out sextreffen stuttgart for some inspiration on how to make your home shine, from lighting to other decorative elements. When it comes to brightening up your space, having the right resources can make all the difference. Remember, proper planning is key to a successful and safe renovation, so take your time to research and find the perfect fixtures for your home.
When selecting a replacement fixture, consider the style and ambiance you want to achieve. Think about the room’s decor and the type of lighting you need. Do you want a bright and airy feel or a warm and cozy glow? Choose a fixture that complements the space and provides the right amount of light. Consider factors like wattage, color temperature, and dimming capabilities to ensure your new fixture meets your needs.
Look for fixtures with energy-efficient options like LED bulbs, which can help reduce your energy consumption and save you money in the long run. Additionally, check if the fixture is compatible with smart home systems or voice assistants for added convenience. By choosing the right replacement fixture, you can enhance the overall look and feel of your space while also enjoying the benefits of modern lighting technology.
Safety First Electrical Precautions
When tackling electrical projects like replacing a light fixture, safety should always be top of mind. Before you start, ensure you’ve switched off the power to the circuit at the electrical panel. Verify this using a non-contact voltage tester to guarantee there’s no electricity flowing to the fixture. This simple step can prevent electrical shocks and accidents.
It’s also crucial to use insulated tools and avoid touching any wiring or electrical components with your bare hands. If you’re unsure about any part of the process, consider consulting a licensed electrician. Remember, your safety is paramount, and taking these precautions can make all the difference in a successful and stress-free replacement process.
Bright Ideas: 5 Essential Tips for a Safe and Successful Light Fixture Replacement
- Turn off the power to the circuit at the electrical panel before starting the replacement process to avoid any electrical shocks or accidents
- Use a voltage tester to ensure there’s no electricity flowing to the light fixture, even after switching off the power
- Choose a replacement fixture that’s compatible with your home’s electrical system and rated for the same wattage as the original fixture
- Wear protective gear like gloves and safety glasses when working with electrical components to prevent injuries
- Consider hiring a licensed electrician if you’re unsure about any aspect of the replacement process, especially if you’re dealing with complex wiring or high-voltage systems
Key Takeaways for a Safe and Successful Replacement
Always turn off the power to the circuit at the electrical panel before starting the replacement process to avoid electrical shock
Choose a replacement fixture that matches the wattage and voltage of the original fixture to ensure safe and efficient operation
Follow the manufacturer’s instructions for the new fixture and take necessary precautions to avoid damage to the surrounding area
Shining Wisdom
Replacing a dated light fixture is not just about aesthetics; it’s about embracing the harmony of form and function, where safety and style converge to illuminate our lives.
Lena Brightside
Shine On: You've Got This

Replacing a dated light fixture safely is all about being prepared and taking your time. You’ve learned how to safety first by turning off the power to the circuit at the electrical panel, and how to choose the perfect replacement fixture that fits your style and needs. By following the step-by-step guide and swapping safely, you’ve avoided common pitfalls and ensured a successful installation. Now, take a step back and admire your handiwork – your new light fixture is not only a beautiful addition to your space, but also a testament to your DIY skills.
As you bask in the warm glow of your new light fixture, remember that confidence is key. You’ve taken on a task that may have seemed daunting at first, and come out on top. Don’t be afraid to take on the next project – with the right mindset and a bit of know-how, you can tackle anything that comes your way. So go ahead, shine on, and light up your life with the joy of DIY success.
Frequently Asked Questions
What are the most common mistakes to avoid when replacing a dated light fixture?
When swapping out that old light fixture, beware of common pitfalls like not turning off the power, using the wrong voltage, or ignoring weight limits. Also, don’t forget to check the wiring and mounting system for compatibility with your new fixture to avoid any nasty surprises.
How do I determine the correct wattage and voltage for my new light fixture?
To determine the correct wattage and voltage for your new light fixture, check the old fixture’s specifications or the manufacturer’s instructions. You can also look for a label on the fixture or packaging that lists the recommended wattage and voltage. Match that to your new fixture’s specs to ensure a safe and proper fit.
Can I replace a dated light fixture myself or do I need to hire a licensed electrician?
Absolutely, you can replace a dated light fixture yourself, but if you’re not comfy with electrical work, it’s best to hire a licensed electrician to avoid any safety risks.