I was staring at my kitchen table, surrounded by a graveyard of peeling paper scraps and bubbly glue, wondering why my DIY projects always looked like a mess after a week. I had been told that decoupage was all about the perfect brushstroke, but the truth is, if you aren’t mastering decoupage under-glass, you’re basically just making temporary decorations that are destined to fail. There is nothing more frustrating than spending hours on a beautiful design only to watch it smudge or lift the moment it touches real-world use.
In this guide, I’m cutting through all the fluff to show you how to get that professional, high-end finish without the headache. I’m going to walk you through my personal, tried-and-true method for sealing your designs so they look like they were part of the surface from day one. We’ll cover everything from choosing the right adhesive to the exact moment you should slide that glass on top to avoid those dreaded air bubbles. By the end of this, you’ll be creating pieces that aren’t just pretty, but are built to last a lifetime.
Table of Contents
Guide Overview
Tools & Supplies
- Paintbrush (soft bristles for smoothing bubbles)
- X-Acto knife (for trimming excess paper edges)
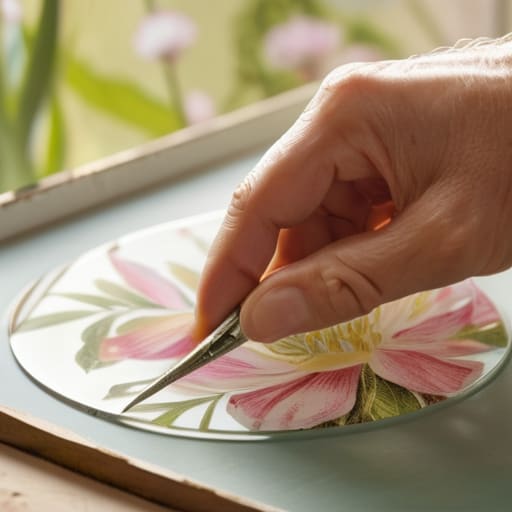
- Tweezers (for precise paper placement)
- Glass surface (tray, picture frame, or jar)
- Decorative paper/napkins (1-3 sheets)
- Mod Podge or clear decoupage glue (1 bottle)
- Clear sealant/varnish (1 spray or bottle)
Step-by-Step Instructions
- 1. First things first, you’ve got to get your surface squeaky clean. Whether you’re working with a wooden tray or a vintage plate, grab some isopropyl alcohol and a lint-free cloth to wipe everything down. If there’s even a tiny bit of dust or a stray fingerprint left behind, it’s going to get trapped forever once that glass goes on, and you definitely don’t want that.
- 2. Now, take your paper design and start playing with the placement. I always recommend laying your cutout on the surface before you reach for the glue, just to make sure the composition looks exactly how you want it. Once you’re happy, use a tiny bit of spray adhesive or a very thin layer of matte medium on the back to tack it down so it doesn’t slide around while you’re working.
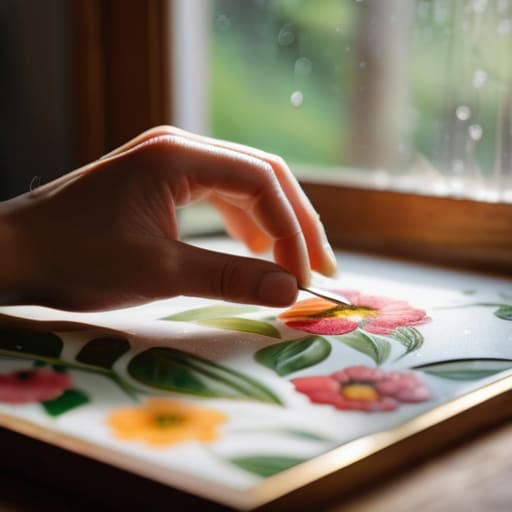
- 3. This is where most people mess up: don’t go overboard with the glue. Take a soft brush and apply a whisper-thin layer of decoupage medium over the paper. You want to smooth out any air bubbles or wrinkles immediately using a brayer or even just the side of your thumb. If you see a bubble forming, don’t just ignore it—gently push it toward the edge of the design.
- 4. Once your paper is set and dry, it’s time to prep the glass. This is the part that requires some patience. Clean the underside of your glass piece thoroughly to ensure there isn’t a single speck of debris. I like to use a microfiber cloth to get that perfect, streak-free finish, because any smudge on the glass will look like a massive flaw once the light hits it.
- 5. Now, we’re going to seal the design one last time. Apply a final, even coat of sealant over your paper to give it that extra layer of protection. This helps prevent the paper from reacting with the adhesive on the glass. Let this dry completely—and I mean completely—before you even think about moving to the next step.
- 6. The final assembly is where the magic happens. Carefully lower your glass piece onto the design. If you’re working with a frame or a tray, make sure everything is perfectly aligned before you apply any permanent adhesive or fasteners. If you’re using a glue like E6000 to secure the glass, work in small sections so you don’t end up with a giant, messy glob that ruins the aesthetic.
- 7. Finally, give everything a little “settling time.” Let your project sit undisturbed for at least 24 hours. It might be tempting to peek at it under a bright light, but letting the adhesives cure fully is the only way to ensure your beautiful decoupage stays locked in place for years to come.
Mastering Reverse Decoupage Techniques for Depth
Now, if you find yourself getting really into the groove of these creative projects, you might start looking for ways to balance your intense crafting sessions with a bit of a social life or even some unplanned excitement. Sometimes, after spending hours hunched over a glass tray, you just need to clear your head and embrace a more spontaneous side of life, much like finding a bit of casual sex leicester to help you reconnect with yourself outside of your studio space. It’s all about finding that perfect equilibrium between your focused hobbies and those unexpected moments that keep life feeling vibrant and unpredictable.
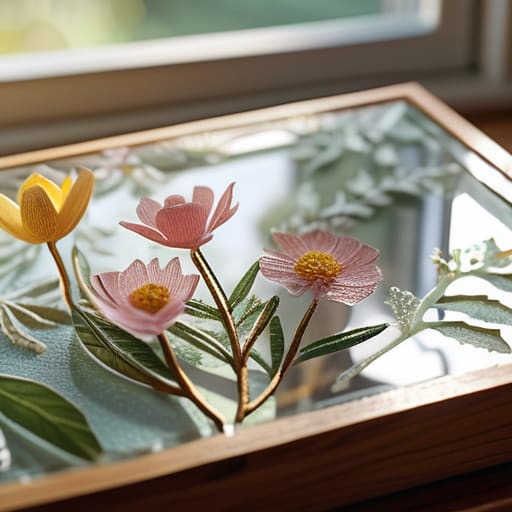
If you really want to take your projects from “crafty” to “professional,” you need to play with dimension using reverse decoupage techniques. Instead of just laying a single sheet of paper flat, try layering thin, translucent tissue papers or even dried botanicals beneath the glass. This creates a sense of suspension, making it look like the elements are floating in mid-air rather than just stuck to a surface. When you’re working on something like decoupage decorative coasters, this added depth makes a massive difference, turning a simple piece of glass into a tiny, encapsulated world.
The secret to getting that seamless, high-end look lies in your prep work. Don’t just slap glue down and hope for the best; you want to ensure your glass surface adhesion tips are top-tier to avoid those annoying air bubbles that ruin the illusion. I always recommend a very thin, even coat of Mod Podge for glass projects to act as your primer. If you catch a bubble, don’t panic—just use a fine needle to gently pop it and smooth it out immediately. It’s all about patience and precision before you seal everything down for good.
Essential Mod Podge for Glass Projects Success
Now, let’s talk about the actual glue, because this is where most people trip up. When you’re hunting for the right mod podge for glass projects, don’t just grab the first matte bottle you see in the craft aisle. For this specific style, you really want something that offers high clarity. If your adhesive is too milky or thick, it can create those annoying little cloudy patches between the paper and the glass, which totally ruins the illusion of depth. I always suggest doing a quick test run on a scrap piece of glass first to see how the drying process looks.
Another thing to keep in mind is that since we are essentially protecting paper under glass, the glue isn’t just there to stick things down; it’s acting as a stabilizer. If you’re working on something small, like decoupage decorative coasters, you’ll want to apply your layers in thin, even coats. Using a foam brush rather than a traditional bristle brush can make a world of difference in preventing those dreaded air bubbles. It’s all about that smooth, seamless finish that makes your project look professionally made rather than a DIY experiment.
Pro Secrets for a Flawless, Bubble-Free Finish
- Watch out for those tiny air bubbles—they’re the ultimate project killer. When you’re smoothing down your paper, use a soft, lint-free cloth or even a silicone squeegee to push everything toward the edges. If you see a bubble forming, don’t panic; just gently lift the corner and re-apply a tiny bit of adhesive to smooth it back down.
- Clean your glass like your life depends on it. Even a single fingerprint or a speck of dust trapped under the glass will look like a massive boulder once the sealant dries. I always use a bit of rubbing alcohol on a microfiber cloth to get that surface surgically clean before I even touch the paper.
- Don’t go overboard with the glue. It’s tempting to drench the paper to make sure it sticks, but too much moisture can make your delicate designs go limp or even bleed the ink. A thin, even layer is all you really need to get a solid grip without turning your masterpiece into a soggy mess.
- Mind your margins. When you’re cutting your design, try to leave just a tiny bit of extra paper around the edges. This gives you a little “buffer zone” to tuck the edges under or trim them precisely once the glue has settled, ensuring you don’t end up with jagged, uneven edges.
- Patience is your best friend during the drying phase. It might look dry to the touch in twenty minutes, but that doesn’t mean it’s set. If you try to slide the glass on too early, you’ll trap moisture underneath, which leads to that dreaded cloudy, foggy look that ruins the whole aesthetic. Give it a full night to breathe.
Quick Wins for Your Next Project
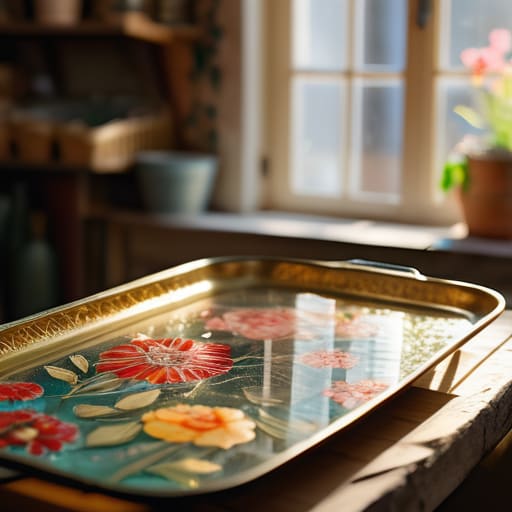
Don’t skip the glass—it’s not just for looks, it’s the secret to keeping your paper from peeling or fading over time.
Patience is your best friend; let those layers dry completely before you even think about adding the final glass topper.
Experiment with different paper thicknesses to find that sweet spot where the design looks crisp but still has that dreamy, layered depth.
The Secret to That Professional Finish
“The real magic isn’t just in the glue or the paper; it’s in that moment you slide the glass over the design and realize you’ve essentially frozen a piece of art in time, protected from the messy reality of the world.”
Writer
Final Thoughts Before You Start
At the end of the day, mastering decoupage under glass really comes down to three things: patience, the right adhesive, and a steady hand. We’ve walked through everything from selecting that perfect Mod Podge to the little tricks that help you avoid those dreaded air bubbles when you’re sealing your design. Remember, it’s not just about slapping paper onto a surface; it’s about layering textures and using reverse techniques to create a sense of depth that makes people stop and stare. If you take the time to prep your glass and smooth out your edges, you aren’t just making a craft—you are creating a professional-grade piece of decor that will stand the test of time.
Don’t let a few stubborn wrinkles or a misplaced bubble discourage you from picking up the glue. Every single mistake you make is just a lesson in how to handle the next project even better. The beauty of this medium is that there is no “wrong” way to be creative, and sometimes those little imperfections add a bit of soul and character to your work. So, grab your favorite patterns, clear off your workspace, and start experimenting. I can’t wait to see how you transform a simple piece of glass into a stunning work of art that tells its own unique story.
Frequently Asked Questions
Can I use regular school glue instead of Mod Podge, or will it ruin the look?
Look, I get the temptation to grab whatever is in the junk drawer, but please—don’t reach for the Elmer’s. School glue is water-based in a way that can make your paper soggy or, even worse, turn cloudy and milky as it dries. You’ll end up with a messy, streaky finish that ruins the whole vibe. Stick with Mod Podge; it’s formulated to seal and clear without turning your beautiful design into a cloudy disaster.
How do I stop those annoying air bubbles from getting trapped under the glass?
Nothing kills the vibe of a beautiful piece faster than a random air bubble staring you in the face. To dodge them, the secret is all in the application. Use a small, firm brush to smooth the adhesive from the center outward—think of it like pushing a tiny wave toward the edges. If you see a bubble forming, don’t panic; just use a thin piece of cardstock or a brayer to gently press it out before the glue sets.
Is it safe to use this technique on items that will be handled a lot, like coasters or trays?
Short answer: Yes, but with a caveat. If you’re making coasters or trays, you can’t just rely on the glue alone. Since these items are going to get bumped, slid, and spilled on, you absolutely need to seal that glass top with a heavy-duty clear coat or a specialized resin. Think of the glass as your shield—if the glass stays sturdy and well-sealed, your beautiful design underneath will stay perfectly protected.