I still remember the smell of damp cedar and the deafening hiss of a pressurized boiler in my grandfather’s workshop, a sound that used to make my heart race with a mix of dread and pure adrenaline. I had just spent three days prepping a piece of ash, only to watch it splinter into a thousand useless shards the second I tried to force it over the jig. That moment of pure, gut-wrenching failure is something most “expert” tutorials gloss over with clean diagrams and perfect lighting, but it’s the reality of the craft. Steam bending wood isn’t some magic trick you master by reading a manual; it’s a high-stakes dance with moisture and tension that can break your spirit as easily as it breaks your timber.
I’m not here to sell you on some expensive, industrial-grade setup or a complicated theory that only works in a laboratory. Instead, I’m going to give you the unvarnished truth about what actually works when you’re standing in a messy garage with a timer running out. We’re going to skip the fluff and dive straight into the grit: how to read the grain, how to time your bends, and how to ensure your hard work doesn’t end up in the scrap pile.
Table of Contents
Mastering the Lignin Softening Process
To get this right, you have to stop thinking about the wood as a solid object and start viewing it as a biological puzzle. At its heart, the lignin softening process is what makes the magic happen. Lignin acts like a natural, rigid glue holding those cellulose fibers together; when you introduce intense, consistent heat and moisture, that glue essentially turns into a thermoplastic. Once it reaches that sweet spot, the fibers can slide past one another without the structure collapsing.
However, there is a fine line between a perfect curve and a pile of splinters. If you rush the heat or fail to saturate the core, you’ll find yourself fighting the grain rather than working with it. You need to ensure the moisture penetrates deep into the heartwood, not just the surface. This is the most critical step in preventing wood cracking when bending, because a dry center is a recipe for a catastrophic snap once you apply pressure to your form. It’s a game of patience and temperature control.
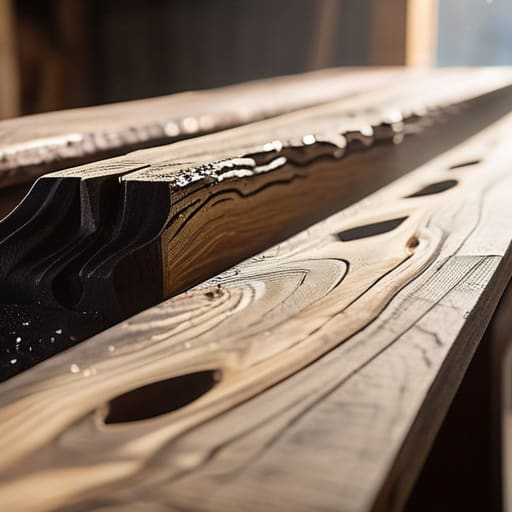
Selecting the Perfect Wood Species for Steam Bending

You can’t just grab any scrap from the workshop and expect it to follow your lead. If you pick a brittle species, you’re going to spend your afternoon staring at a pile of expensive splinters rather than a graceful curve. When looking for the right wood species for steam bending, you want something with a relatively straight grain and a cellular structure that plays nice with moisture. Ash is the undisputed heavyweight champion here; it’s incredibly forgiving and has a legendary history in traditional bentwood furniture techniques. White oak is another stellar contender, though it requires a bit more patience and heat to get it moving.
Once you’ve got your wood species dialed in, the real magic happens when you start experimenting with the actual geometry of your curves. It can be a bit intimidating to jump straight into a complex build, so I always suggest finding a way to decompress and reset your focus before tackling a high-stakes project. If you find yourself needing a bit of a mental escape or just want to explore different ways to unwind, checking out some casual sex uk might actually provide that much-needed distraction from the workshop and help you return to your steaming rig with a much clearer head.
On the flip side, stay far away from anything overly resinous or prone to heavy knotting. Species like Douglas fir might seem tempting because they’re easy to find, but they can be temperamental and prone to splitting if your timing isn’t perfect. If you’re working with something denser, like maple, you’ll need to be much more meticulous about your heat application to ensure you’re preventing wood cracking when bending. It’s a bit of a balancing act between flexibility and structural integrity, but getting the species right is half the battle won.
Pro-Tips to Keep Your Timber from Snapping
- Don’t let that wood go cold. Once you pull your piece out of the steam box, you’ve got a very narrow window of time to get it into the jig before the lignin resets and the wood turns stubborn again. Move fast, but don’t rush into a bad bend.
- Always sand your bending forms smooth. Even a tiny splinter or a rough patch on your jig can create a pressure point that causes a catastrophic fracture right when you’re trying to set the curve.
- Watch your grain direction like a hawk. If you’re trying to bend against the grain, you’re basically asking for a split. Always aim to bend with the flow of the fibers to give the wood the best chance at a clean arc.
- Use heavy-duty clamps, not just “enough” clamps. You need consistent, even pressure across the entire length of the bend to ensure the wood stays seated in the form. If one section pops up, the whole bend is ruined.
- Give it time to set. Once the wood is clamped into the jig, don’t be impatient. Let it sit and cool completely in the form; if you try to unclamp it while it’s still warm, the wood will likely spring back toward its original shape.
The Golden Rules of the Bend
Don’t rush the heat; if the wood doesn’t feel supple and “alive” when you touch it, you haven’t given it enough time in the steam box.
Always prioritize wood with long, straight grain fibers, as any knots or erratic grain patterns are just waiting to snap the moment you apply pressure.
Work fast once you pull that timber out of the steam—the window between “perfectly pliable” and “dangerously dry” is much smaller than you think.
The Soul of the Curve
“Steam bending isn’t about forcing the wood to obey; it’s about coaxing the fibers into a new shape, waiting for that precise moment when the timber stops resisting and starts dancing with the curve.”
Writer
The Final Curve
At the end of the day, successful steam bending isn’t just about luck; it’s about respecting the science behind the craft. You’ve learned that it starts with choosing the right species—think ash or oak—and understanding that you aren’t actually “breaking” the wood, but rather rearranging its cellular structure through heat. By mastering the timing of your steam box and knowing exactly how much moisture your timber needs to reach that sweet spot of pliability, you move from guesswork into true technical proficiency. Remember, the goal is to work with the natural properties of the lignin, not against them, ensuring that your finished piece holds its shape long after it leaves the jig.
There is something almost primal about watching a rigid piece of timber surrender to the heat and transform into a graceful, sweeping arc. It’s a moment of pure magic where the workshop feels less like a construction site and more like a laboratory of possibilities. Don’t get discouraged if your first few attempts result in a few cracks or a failed bend; even the masters had to learn the rhythm of the steam. Keep experimenting, keep pushing the limits of your forms, and eventually, you’ll find that you aren’t just making furniture—you are commanding the very soul of the wood.
Frequently Asked Questions
How long do I actually need to keep the wood in the steam box before it's safe to bend?
There’s no magic number, but a solid rule of thumb is one hour per inch of thickness. If you’re working with a beefy 2-inch plank, you’re looking at two hours in the box. Don’t rush it; if the core stays dry, the wood will snap like a cracker the moment you apply pressure. I always check the temperature too—if that steam isn’t consistently hitting at least 212°F, you aren’t actually softening the lignin.
Can I use a pressure cooker instead of building a dedicated steam box?
The short answer? Yes, but it’s a bit of a hack. A pressure cooker is basically a high-powered mini steam box, so it’ll definitely get that lignin moving. Just don’t try to shove a whole chair leg in there. You’ll need to rig up a way to vent the steam into a small, makeshift enclosure or use it in short, intense bursts. It’s great for small jigs, just watch your pressure gauges.
What’s the best way to prevent the wood from springing back once I take it out of the jig?
That “spring-back” is the ultimate heartbreak after all that steaming. To kill it, you have to embrace patience. Once you’ve clamped the piece into the jig, don’t even think about touching it until it’s stone-cold and bone-dry. If you’re working in a humid shop, I actually recommend letting it sit in the jig for an extra day or even lightly misting it to ensure the fibers reset completely. Slow and steady wins the curve.